SysMeasCs5 - Teach-in with 3 spheres
This cycle determines a coordinate system which is defined by the centre points of three spheres. The automatic measurement of the three spheres determines their centre points in order to calculate the necessary coordinate system parameters.
The sphere diameter must be significantly greater than the sphere diameter of the touch probe for a successful calibration.
A pre-positioning for the second and third spheres must be specified for the measurement. Here, an approximate parameter is sufficient. However, the deviation from the actual position of the spheres should be small.
Forming a new coordinate system
The centre point of the first sphere measured specifies the relative shift of the coordinate system. The system can also be further shifted by the cycle input parameters @P9@P11.
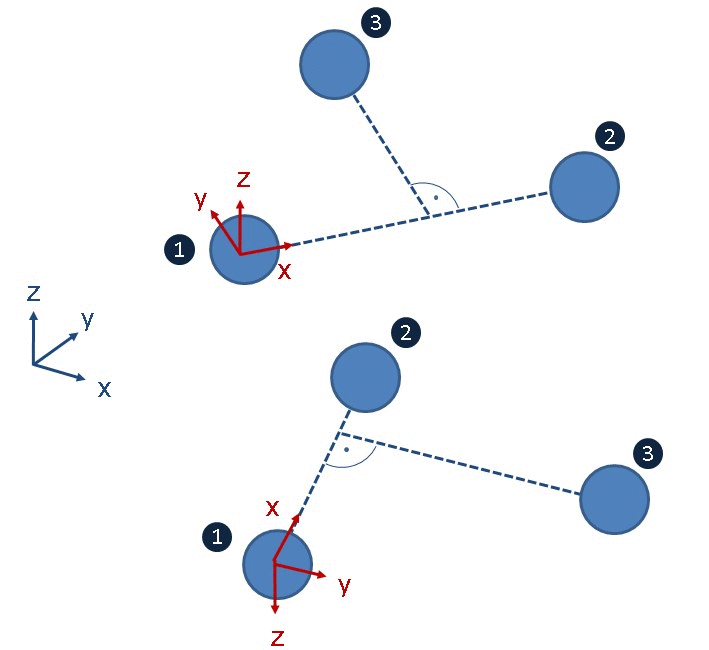
The rotation of the new coordinate system is calculated so that its X axis runs through the vector from the centre point of the first sphere to the centre point of the second sphere (irrespective of the shift by the input parameters). The Y axis is obtained by the vertical projection of the centre point to the third sphere on the new X axis. The Z axis is defined in order to retain the original rectangular system representation.
The graphic below describes the measurement of three spheres in the XY plane. The spheres therefore have the same height in the original coordinate system.

It becomes obvious that the measurement order influences the resulting coordinate system.